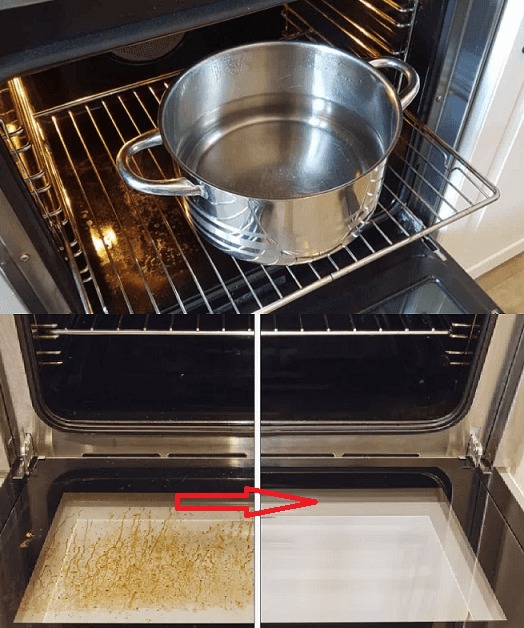
Deciding Between Cleaning and Repair: Why Proper Oven Cleaning Matters
An oven that looks grimy or has baked-on grease may seem like a simple cleaning task, but understanding the difference between surface dirt and actual damage is crucial. If your oven’s interior is just dirty, a thorough cleaning can restore it to near-new condition. However, if the oven has rust, corrosion, or damage to heating elements or seals, cleaning alone won’t suffice and professional repair costs can range from $150 to $400 or more depending on the brand and extent of damage.
Before you start any cleaning, assess the condition of your oven’s surfaces. Most ovens have enamel-coated interiors, which are durable but can be scratched or damaged by abrasive cleaning methods. Using harsh chemical cleaners or scrubbing too aggressively can permanently damage this coating, leading to costly repairs or the need for replacement.
Identifying whether you are dealing with removable grime or irreversible damage is the first step. Surface dirt often appears as blackened, greasy patches or food residue stuck to the oven walls and floor. Damage, on the other hand, includes rust spots, chipping, or burnt-on discoloration that won’t come off with cleaning.
Simple Tests to Determine Your Oven’s Condition
- Visual inspection: Look for cracks, chips, or rust on the oven walls and racks.
- Touch test: Run a damp cloth over greasy spots to see if the grime softens or lifts easily.
- Smell test: A persistent burnt or chemical odor after cleaning attempts can signal damage to internal components.
If your oven passes these checks, it’s safe to proceed with a cleaning method that uses gentle, non-toxic ingredients to avoid health risks and preserve the oven’s finish. Professional oven cleaning services typically charge between $100 and $200, but many homeowners can achieve excellent results themselves with the right technique.
Failing to clean an oven properly can lead to buildup that affects cooking performance, increases energy consumption, and accelerates wear on heating elements. On the other hand, using unsuitable cleaners or abrasive tools risks surface damage that is expensive to fix.
Choosing the right approach means balancing effective grease and dirt removal with protecting your appliance’s materials. This guide focuses on a safe, affordable, and environmentally friendly method using baking soda and vinegar—the two ingredients that, when used correctly, break down grime without harsh chemicals or scrubbing that could harm your oven.
The method described here is suitable for ovens with enamel or stainless steel interiors but should not be used on self-cleaning ovens without consulting your manufacturer’s guidelines, as some cleaning agents or procedures may void warranties.
Always disconnect your oven from power and let it cool completely before cleaning, and if you encounter structural damage or malfunctioning parts, contact a qualified appliance repair technician.
Get ready to see your oven transformed safely and efficiently with a method that saves money and avoids the risks of commercial chemical cleaners.
Here are the key steps in this cleaning process—one is especially critical to avoid common mistakes that can damage your oven.